
Fitting Information
Ghost treeless saddles are a wonderful innovation in treeless saddles. It's come the closest I've seen to fitting every horse - although I would never claim that it would work for every horse because, in the end, the horse has the final say. And just like people, they're all different and have different preferences.
Here are some printable basic fitting instructions provided by Ghost:
Step 1 - placing the panels
Step 2 - positioning the saddle on the horse
Step 3 - balancing the rider (coming soon!)
Links to the video version of the above docs - https://fb.watch/2rnqqJT3Cc/ , https://fb.watch/2rnKbX3pjq/, )
Here's a video our Canadian dealer made on setting up the panels.
On the Fitting a Ghost link below are additional hints from what I've learned about the amazing adjustability of Ghost saddles while testing fit on several horse shapes and fitting my difficult arab as we work toward doing a 100 mile ride this year.
Click here for contact information to our fitter network - wonderful people who love Ghost, have a higher level of fitting experience, and are willing to help people fit their horse or decide what model to demo or purchase.
Click here for some general notes and experiences on fitting a Ghost saddle to your horse.
Base flexibility
Panel placement
Girth rigging
Seat balance
Shims
Sweat patterns
Impression pad
Pressure sensor tests
Seat size
Quick miscellaneous
Here's a video on running your stirrup strap buckles at the bottom with the keepers - very comfortable under your leg! This is a bit old, but here's a doc on fitting your saddle.
And another YouTube video on removing/replacing the seat, either for fun or to change seat styles. I do have another hint to not becoming frustrated with velco wanting to grip before you're ready - place a large plastic bag between the seat and base while you're aligning the front of the seat, then slip out as you carefully press the seat into the base. New! The later seats have additional velcro tabs just behind the flap that go under the base so you might need to remove or pull up the back of the panels to release these before pulling the seat off.
Base flexibility
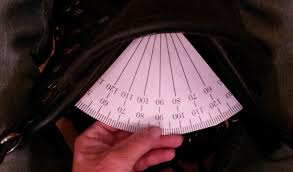
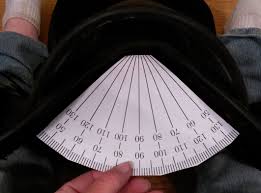
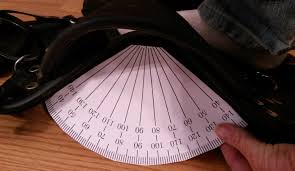
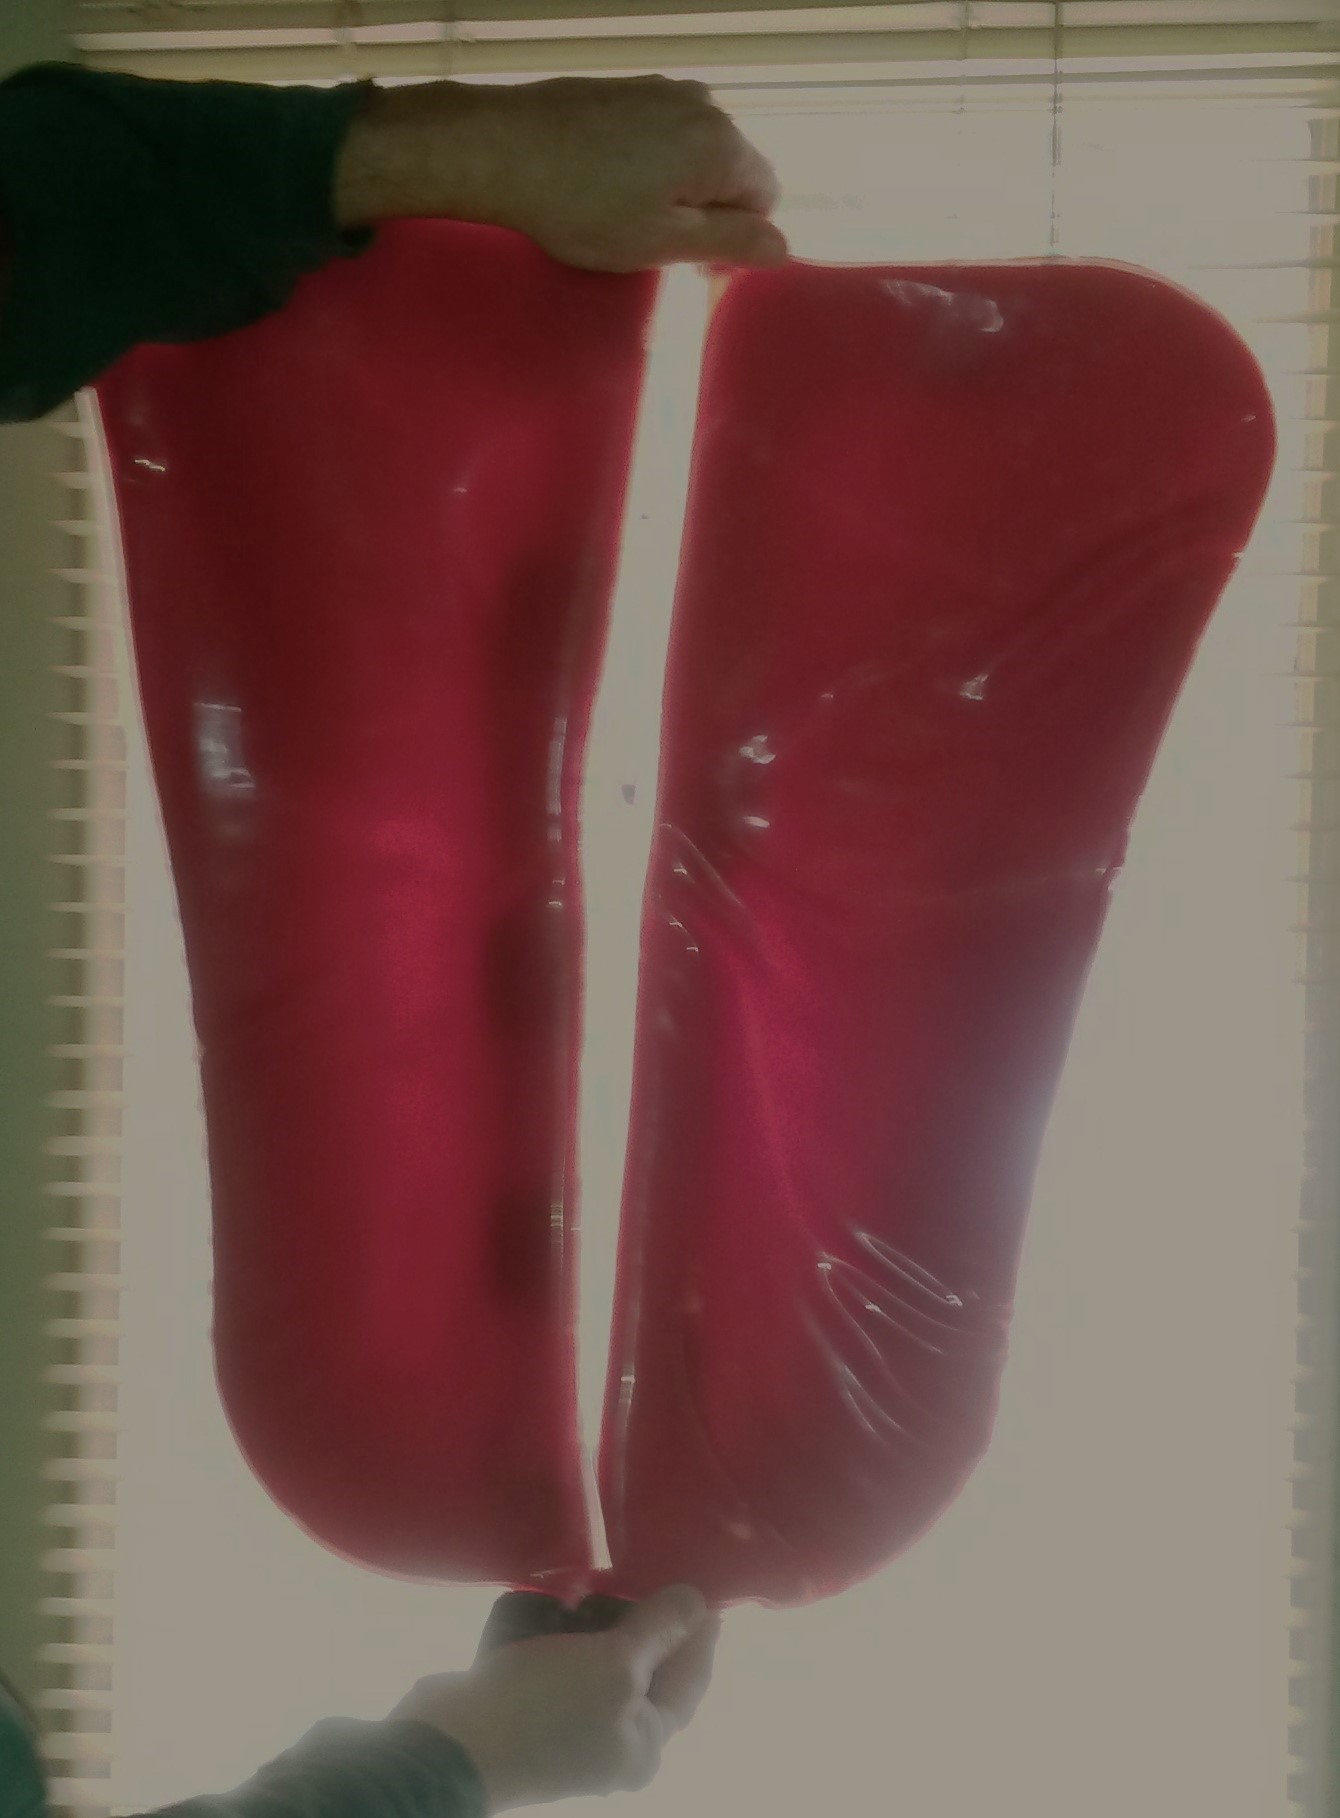
The Ghost base is flexible where needed, but semi-rigid in the right places to keep a narrow twist for the rider, distribute weight where the horse is able to carry weight, and provide a structured pommel lifted over the horse's withers. While this doesn't directly relate to horse shapes, the following pictures show angles the base can fit. Ghost does a great job of fitting even the widest horses - check my saddle testing page for ones I've ridden - including draft breeds. The standard pommel has some rigidity, but it can shape to the wider horse. For horse with a lower wither and broad, powerful shoulders, it may be necessary to choose the option of a less rigid pommel. Or the standard pommel can be maually widened with a bit of effort.
|
|
|
|
|
80 degrees |
90 degrees |
110 degrees |
Panel and pad foam
Ghost panels are filled with three layers. The top layer is thin and stiff and adds to the weight distribution properties of the base. The middle layer is thicker. It absorbs shock and moves with your horse - at the same speed as your horse, rather than a slow rebound unlike memory foams. It also has the same properties across a wide range of temperatures. The bottom layer is a softer foam to absorb shape changes and just put something softer next to the horse. As Ghost is determined to continually evolve and improve, more materials are always being tested. I personally test materials by putting them in the freezer or the oven and dropping cannon balls on them!
Panel placement
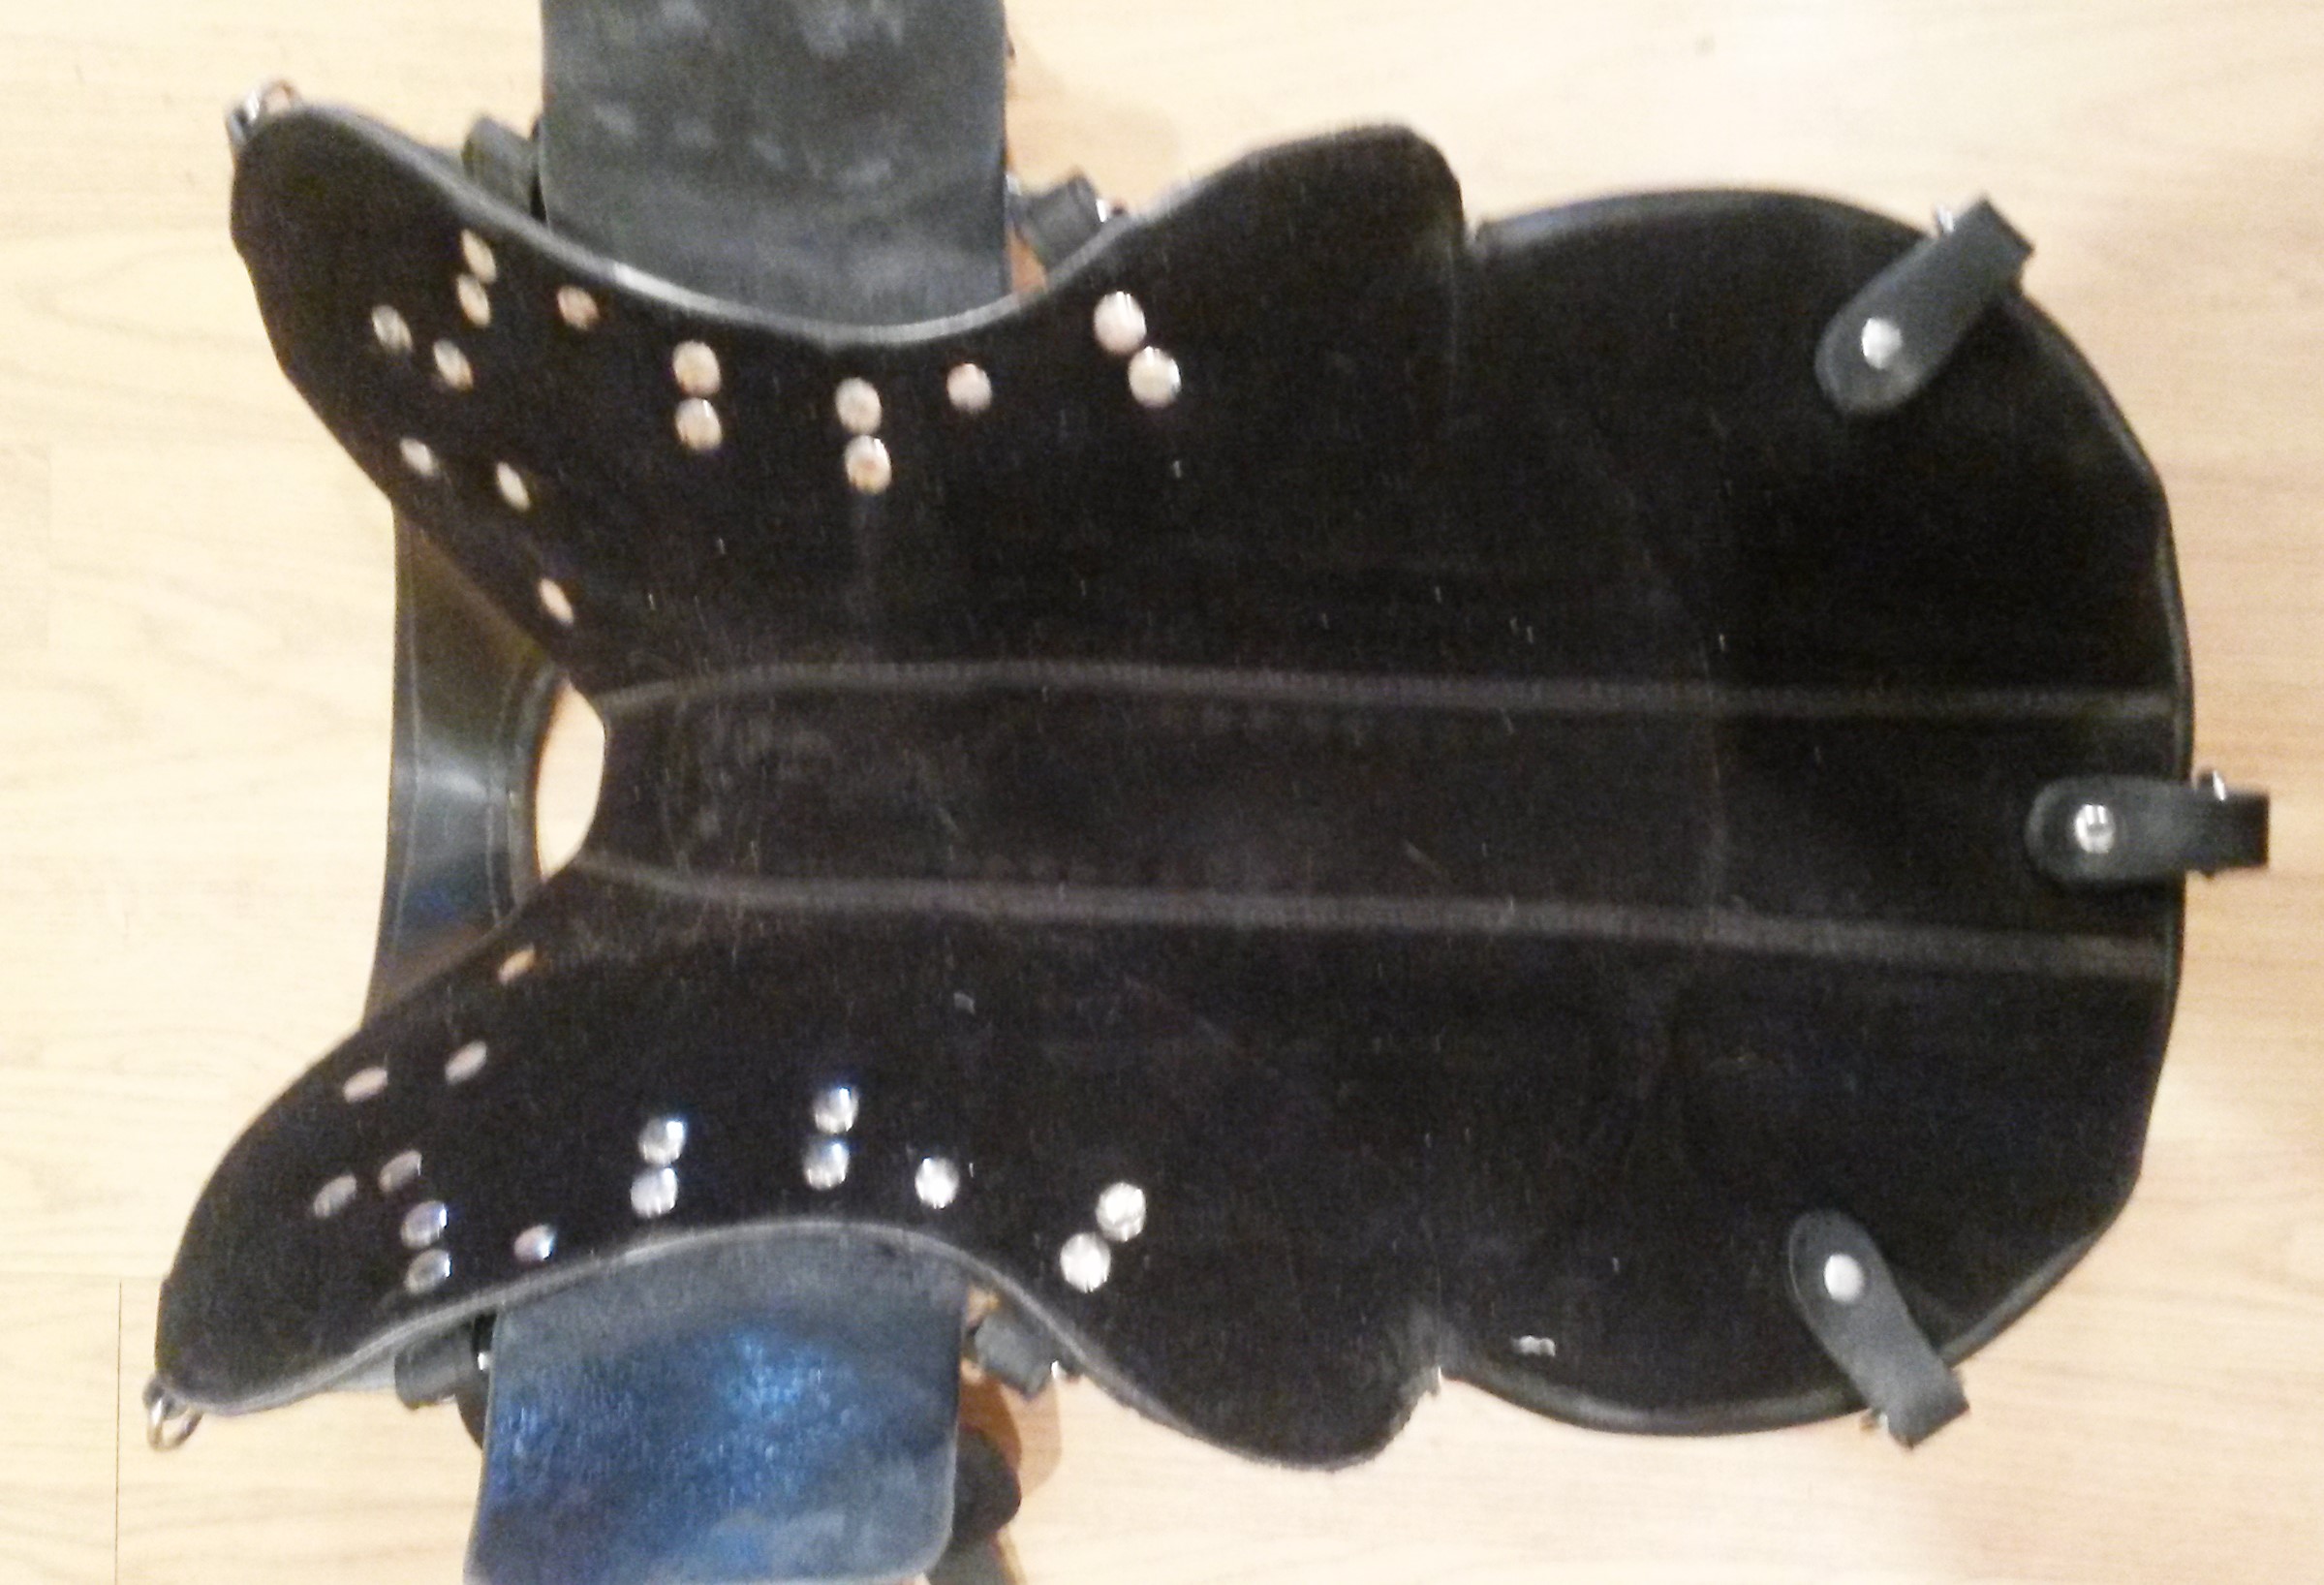
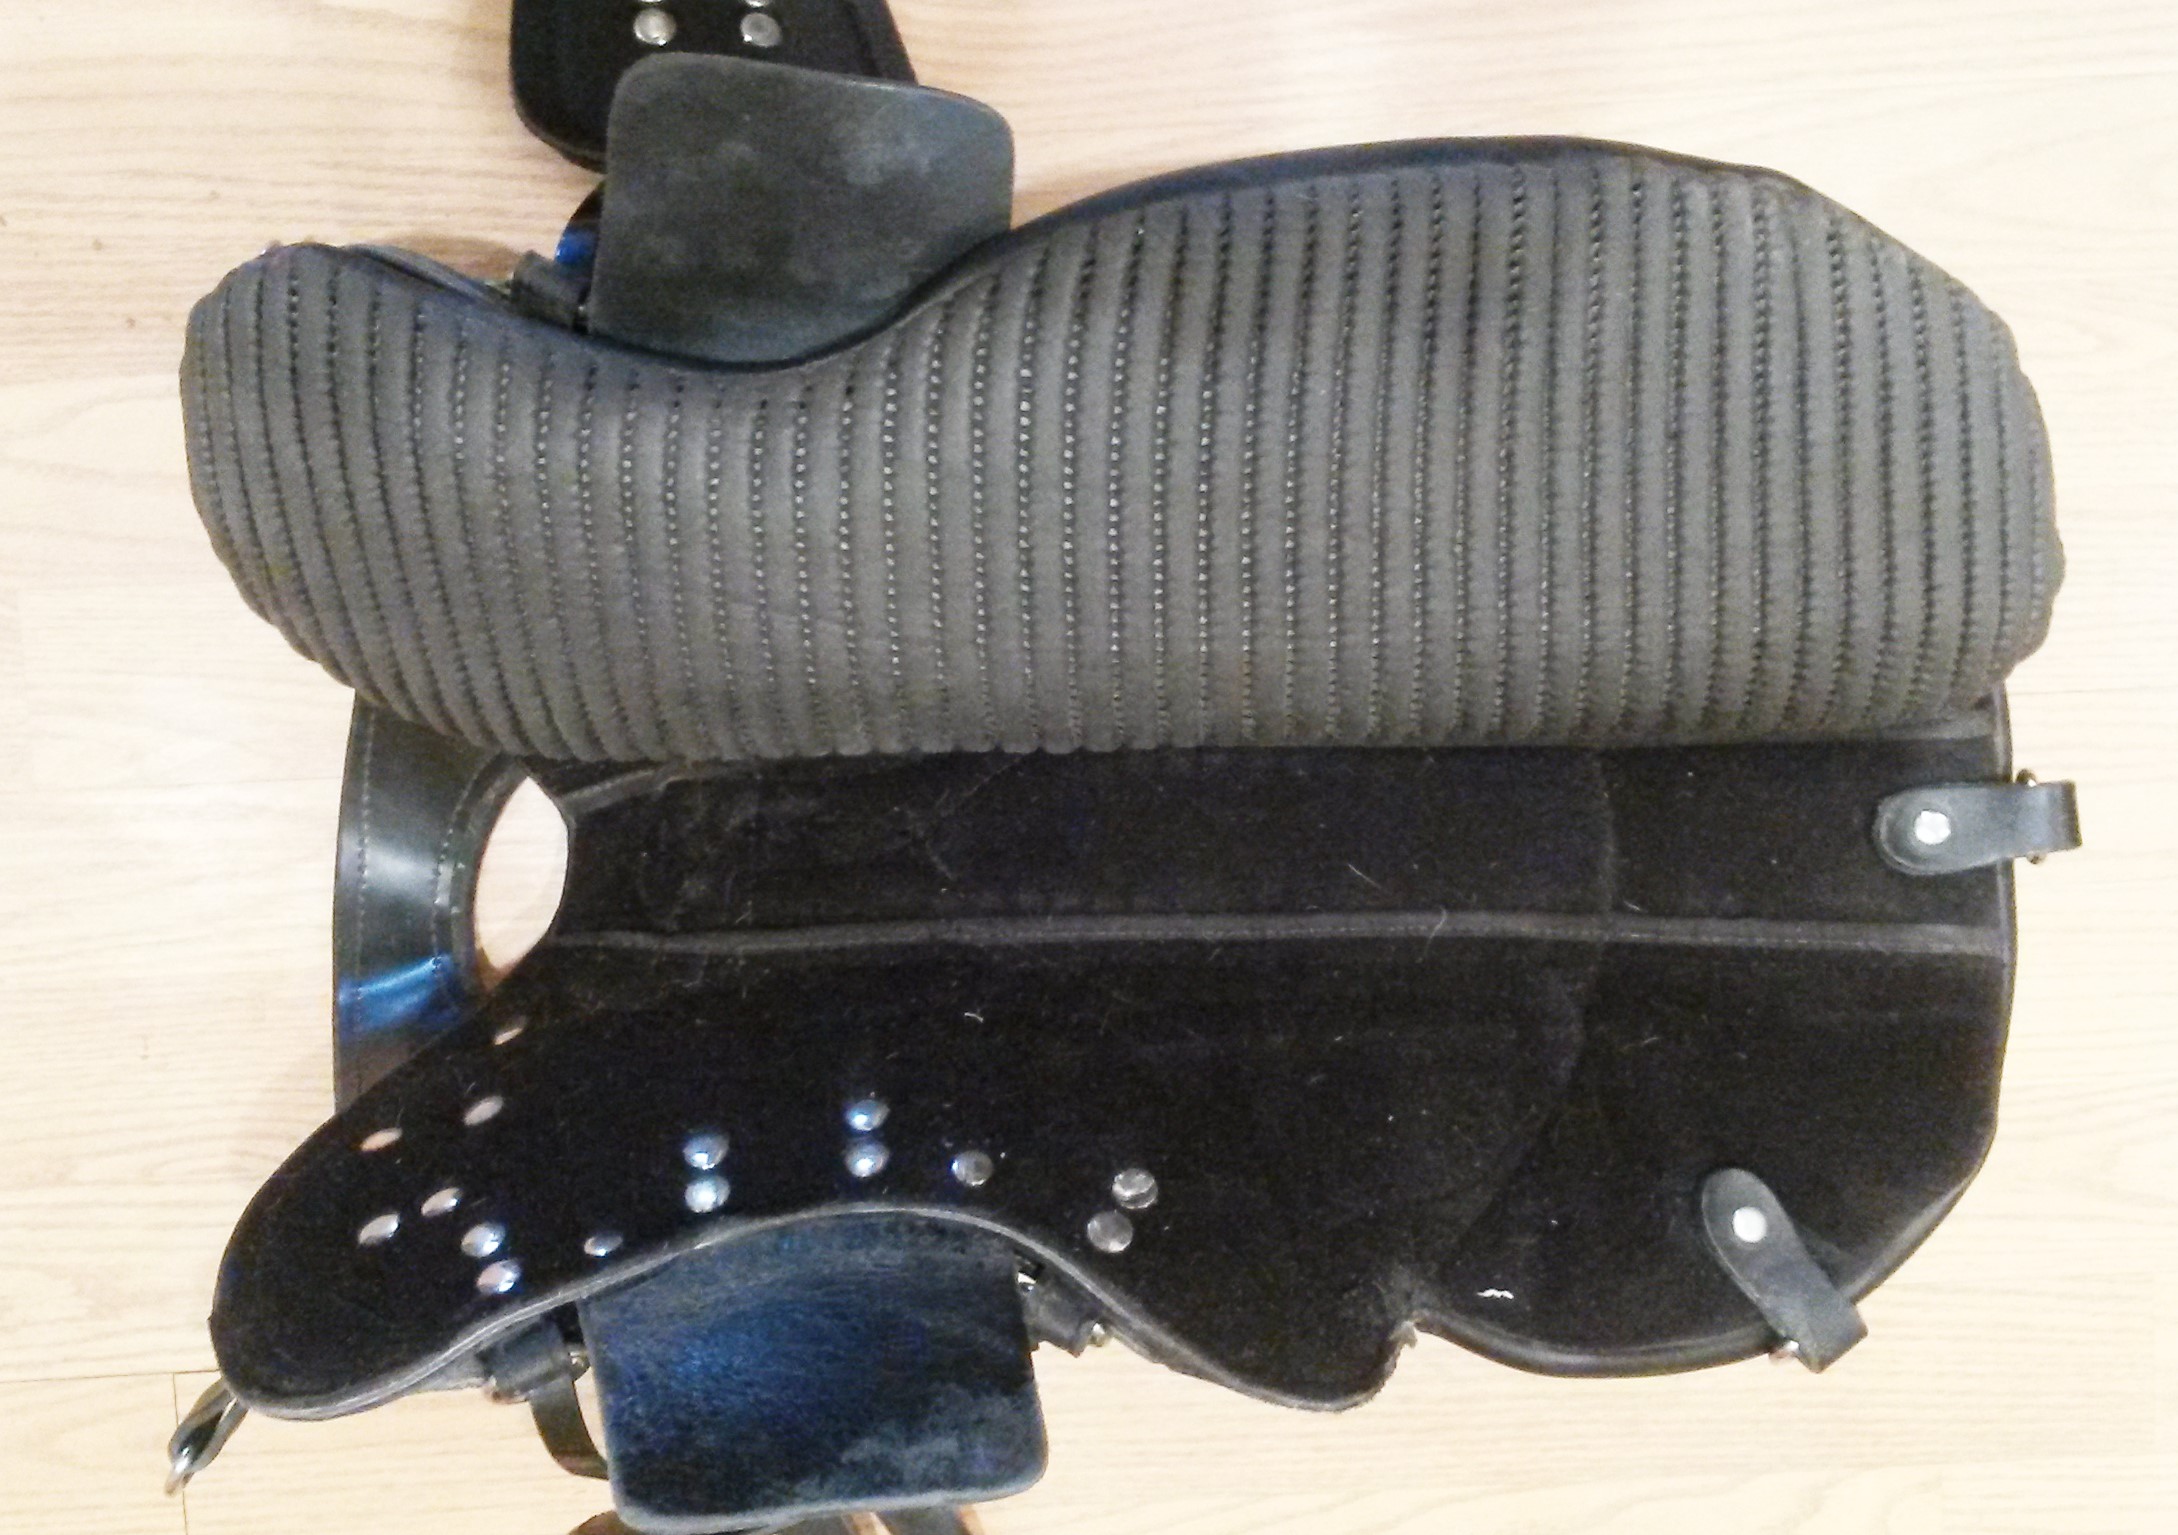
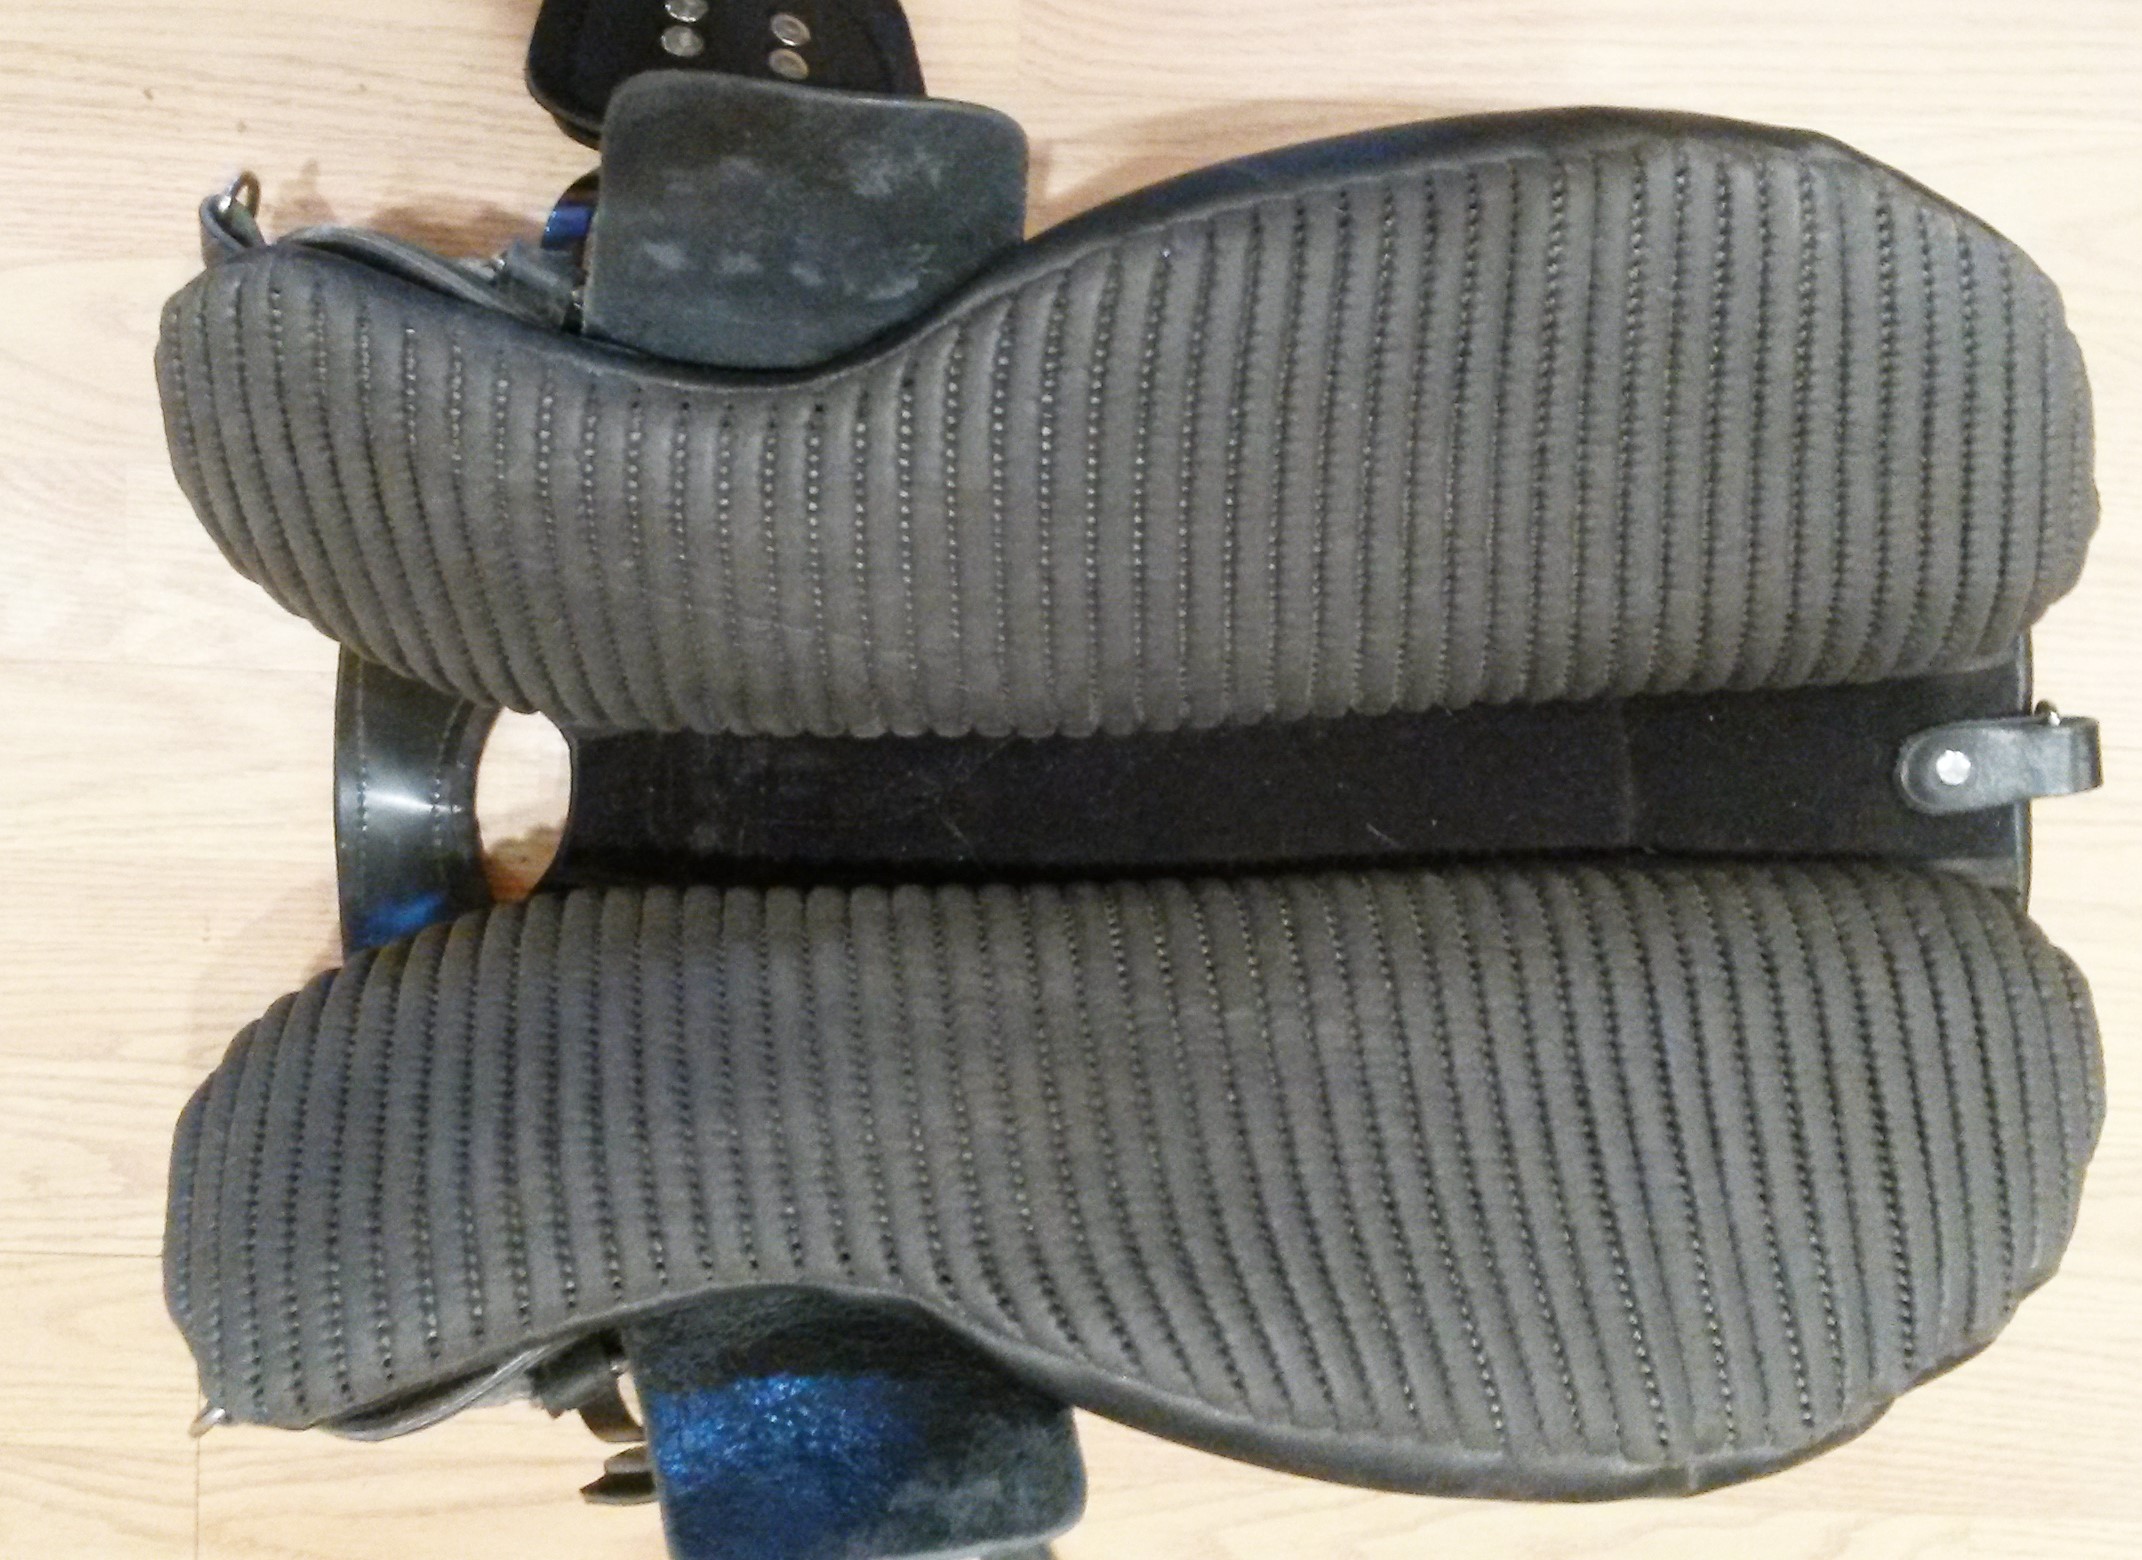
If you're like me, the first thing you'll do when you receive your Ghost is take it apart and see just how much you can play with it. I took some pictures on putting the panels back in place since you can use them to adjust fitting for your horse or even insert shims to change the balance of the saddle for your horse.
Make sure the seat is in place with front velcro strap centered between stitch lines on bottom of base. Use one hand to line up curvature of panel to shape of the front of the saddle and lay panel in place along the stitch lines, just leaving the lines visible. Aim for a 4-5cm or 1.5-2" gap. Press into place.
If you need to raise the saddle to balance for a downhill horse or one with higher withers, narrow the gap between the front of the panels. Widen to lower the front of the saddle. In both situations, do this with care. You don't want to drop the base onto the spine or pinch the withers. After making an adjustment, feel with your hand to make sure all feels good while the horse moves. Gentle squeezing is okay, painful rubbing is not. If these adjustments aren't enough, you may need to add shims inside the panels. Wool felt cut to an angle to make a wedge is a great material and I have shims available for purchase or they're sent along with your saddle. NOTE: It is important that changes in the position of the panels be made with the anatomy of the horse in mind, so best to be done with an experience Ghost fitter's advice. You will get much better balancing results using any of the rider balancing products available.
|
|
|
|
Tip:
A good test to know you haven't widened too much is to take some double knotted balingtwine and make sure it slides easily between the panels with the rider in place after a few minutes of riding. If you feel the panels are too tight on your horse's wither/shoulder area, return the panels to normal or wider position and balance the rider as needed. If the panels are too close, you won't be able to pull the pad up into the gullet and run the risk of a pad insert/panel position mis-match.
Here's a great video -
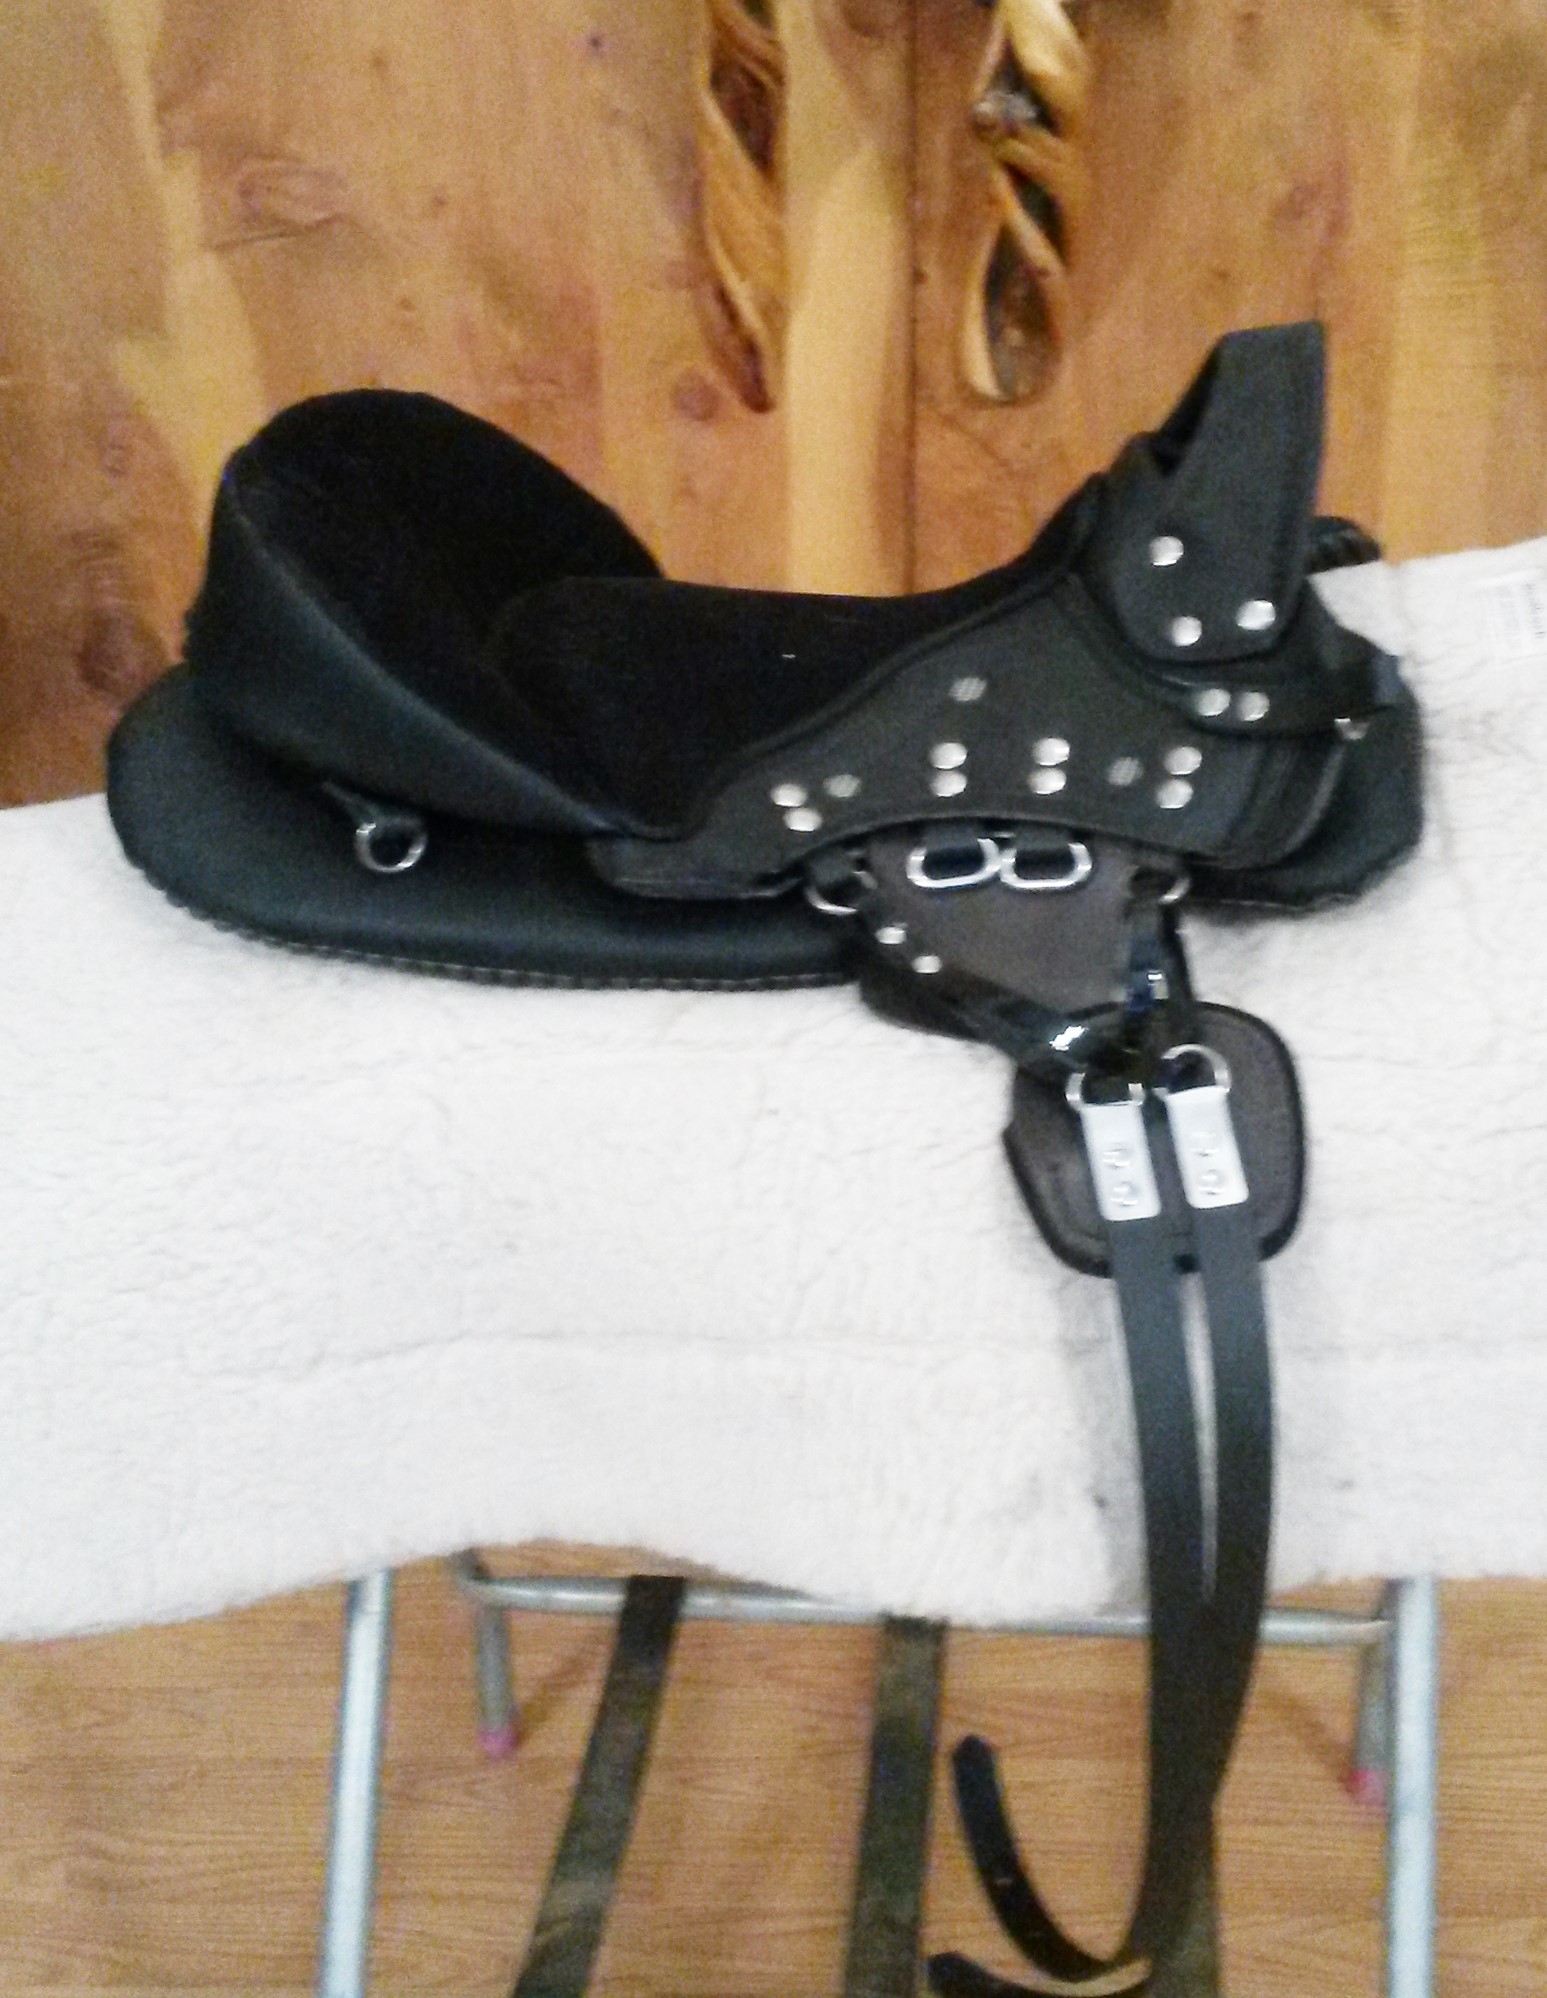
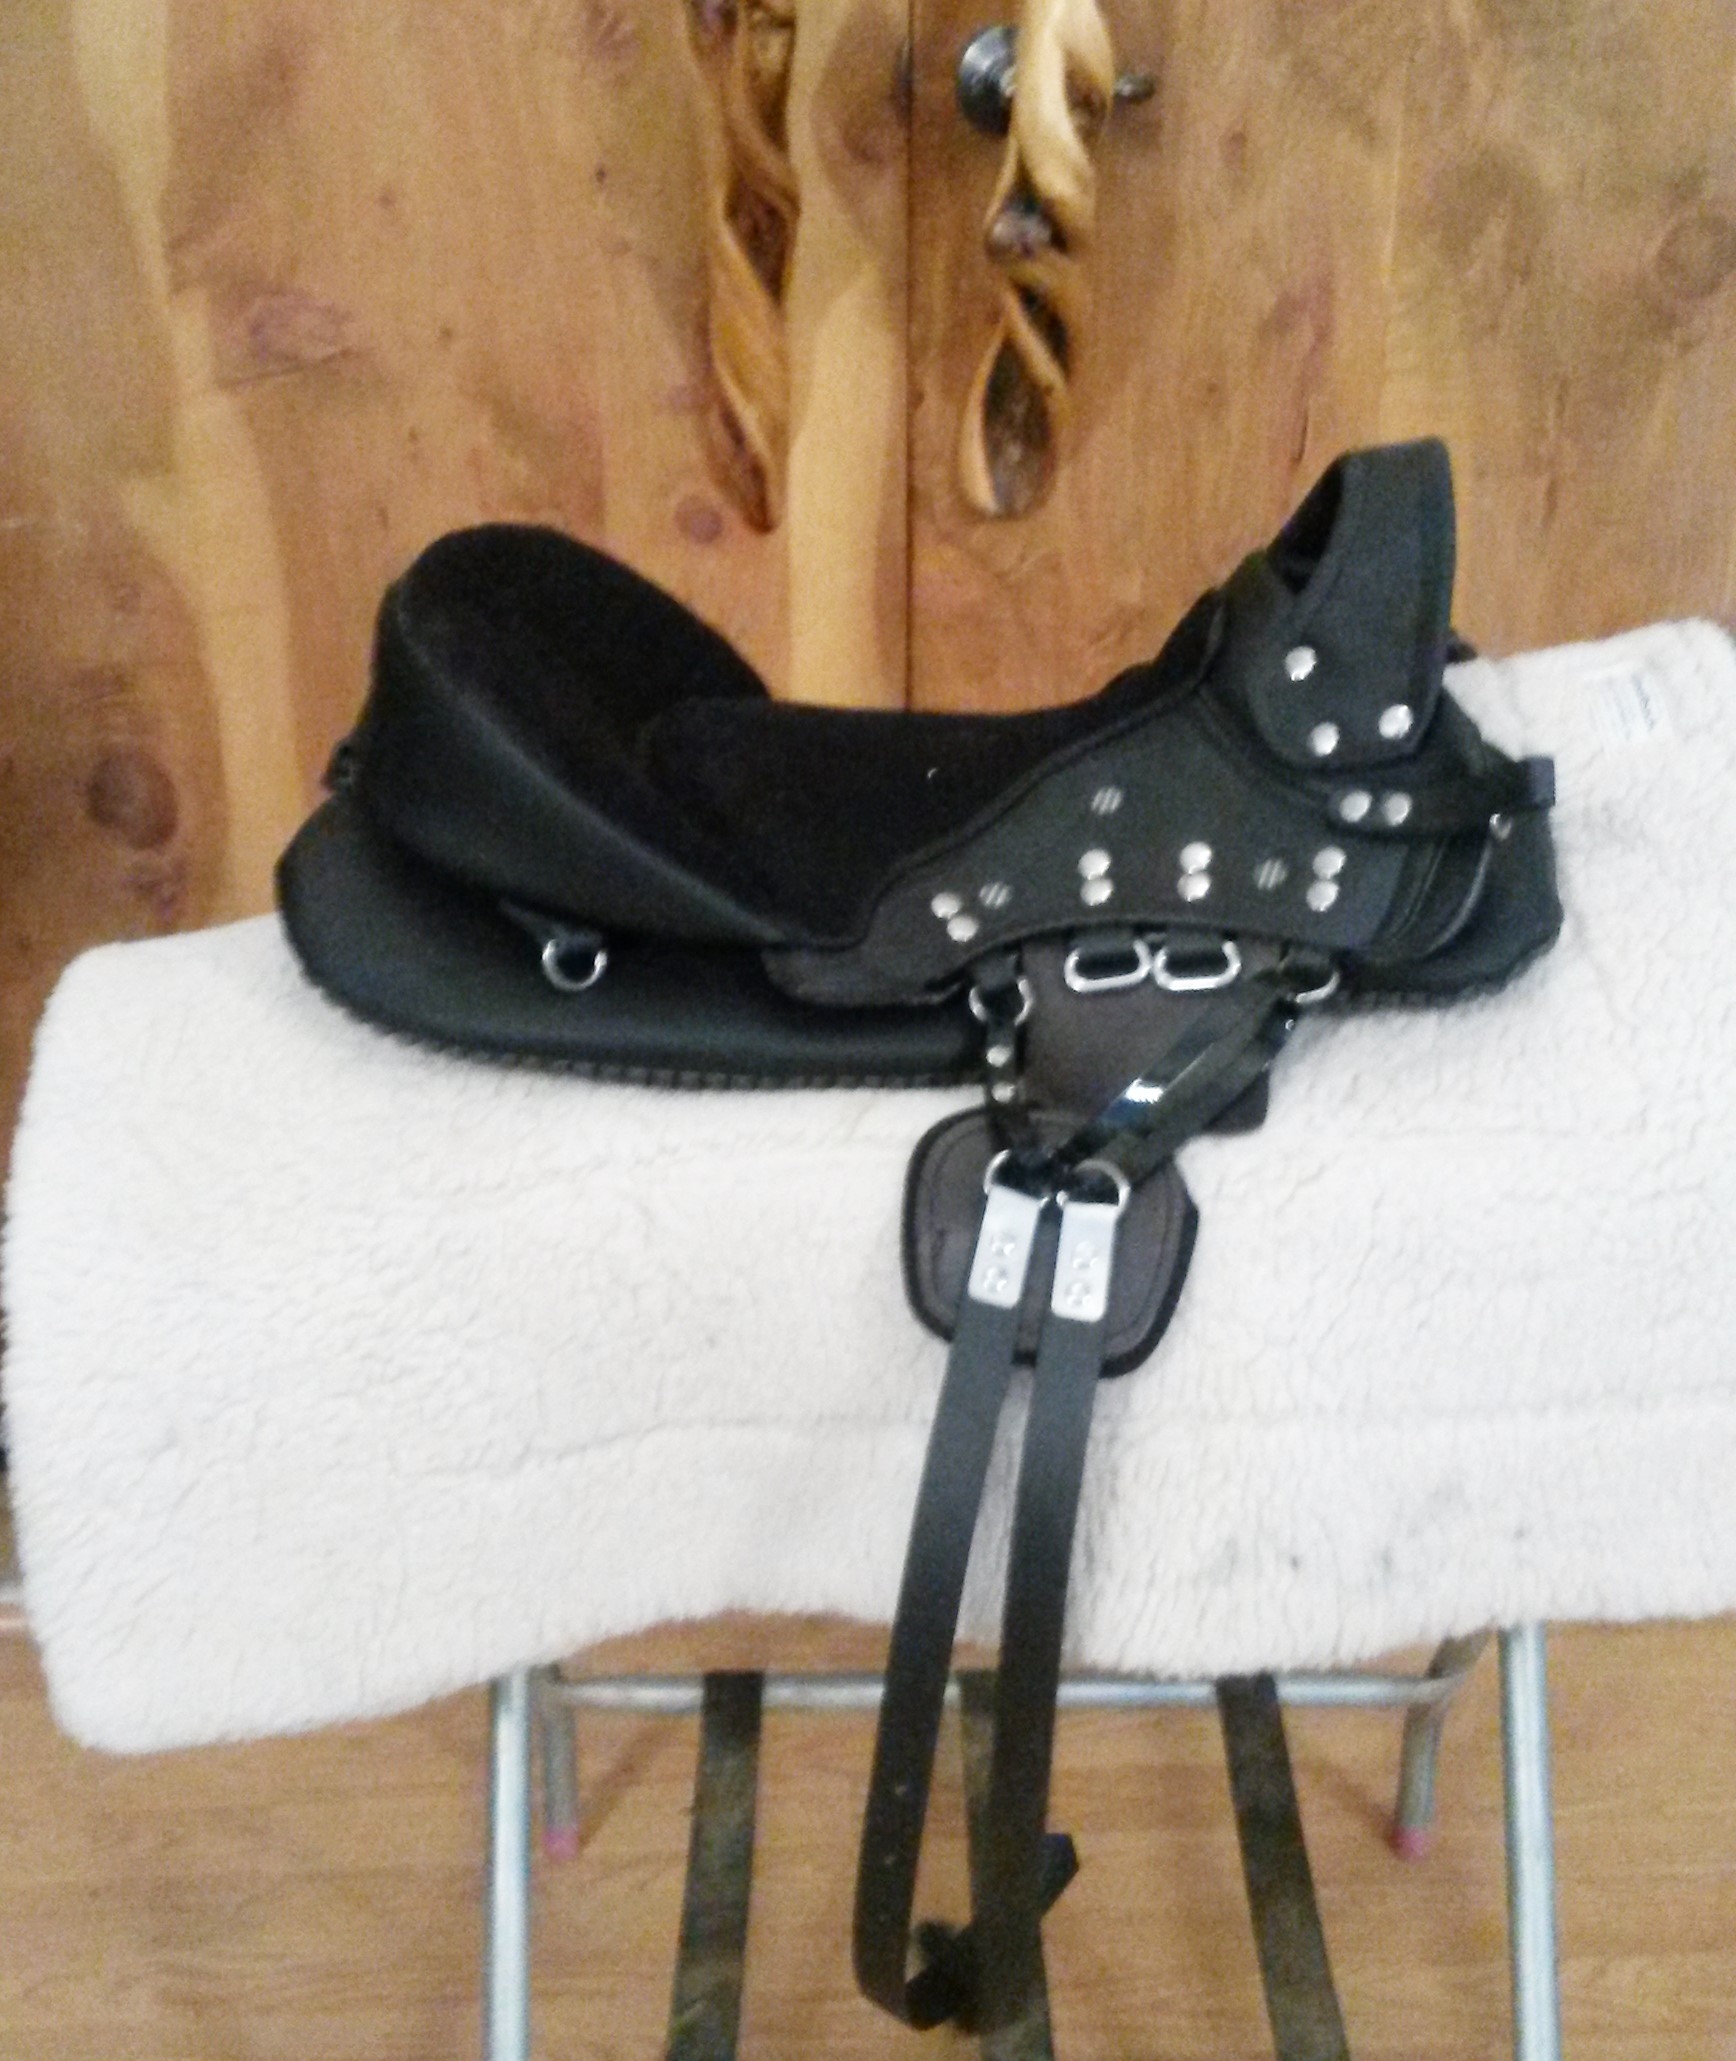
Girth Rigging
One of the most brilliant, yet simple, design features of the Ghost is the "V" girth rigging. It allows you to position the saddle correctly, yet line the girth up with the horse's girth groove. Here are pictures of how big a range this can be:
 |
 |
The V rigging is a game changer for horses with powerful, laid back shoulders and forward girth grooves where you may want the saddle to move with all that dynamic motion. But for most horses, stability is perfect, often improved, with the newer Cavallin (or Puro) fixed Y rigging. This was created for the flapless Puro saddle to avoid the bulk of the sliding V directly under the rider's leg. Two simple straps attache from the same wide starting point as the sliding V, but because they stay wide for longer, the saddle can be more stable forward/back and even side to side. The best way to set your girth is to make sure the billets independently aim toward the girth groove (don't let the billet protector artificially create a centerfire rigging which can cause all kinds of instability) and typically tighten the front billet one hole tighter than the rear for even pressure across the width of the girth.

Seat balance
If you've read my ride notes, my first ride in a Ghost on Ava was a great success. I was stable and comfortable even through steep terrain and a couple bucks. However, when I looked at my picture at the end, I realized my back was a bit arched and I was tipped forward. When I asked for a solution, another Ghost dealer was there for me! An Australian dealer had an idea for a seat bolster that worked for me as well. I used a piece of memory foam that I'd cut up and stuffed it into a sock. Ghost now makes a nice velcro wedge bolster that can be moved forward or back for a lesser or greater affect in pelvis tilt. And as an added benefit to some, the bolster refines the twist and deepens the seat. If you don't want anything changing the shape at the front of the seat, then better to balance the seat with shims in the panels or pad which are more effective in any case.
|
|
|
|

Shims
Balance can become more of an issue with extremely straight-back horses (and mules). But with a saddle this flexible in adjustability gives us plenty of tools to handle this shape as well. My mare Ava has a nearly level back - and I'm not talking about the top of the spine, but the shape the back follows about 3" down from the spine. This is the area that needs to match (to a certain extent, because the layers of foam in panel and pad can absorb quite a bit of mismatch) the shape of the panel. This pic shows me using a flexicurve (usually available at drafting or office stores) to get Ava's curve.
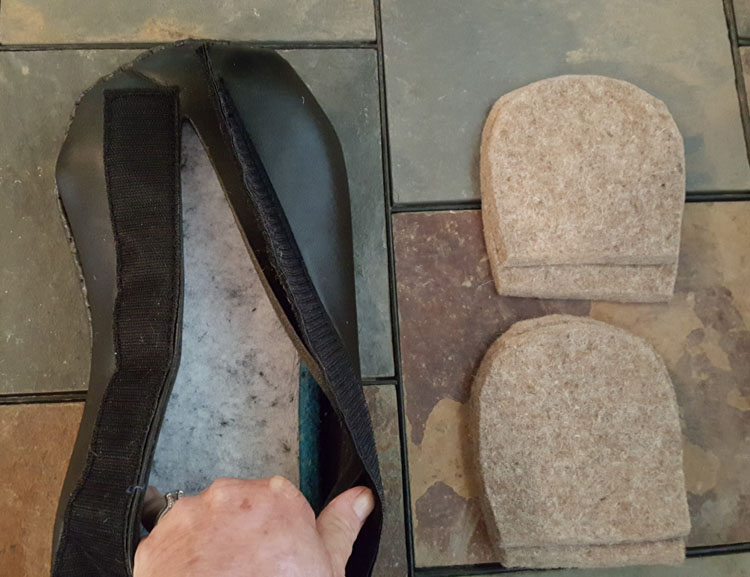
I can add a wool felt shims inside the panel sleeve. I send a pair for each side with demo saddles, each 1/4" thick and beveled. They're soft and sit farthest from the horse, so no worries about the edge causing pressure. I can add another in the pad pocket for downhill horses as well. We've done impression pad tests as well as a simple pressure sensor pad test to see how well Ghost distributes weight for "normal" horses as well as Ava's back with her shims and I've been quite impressed. I never would have guessed a treeless saddle could do so well. If both panel and pad shims are needed, it's best to order a base with a rigid pommel as this usually aleviates the need for at least one shim.
 |
|
| Open panel velcro | Insert shims at front of panel |
Sweat patterns
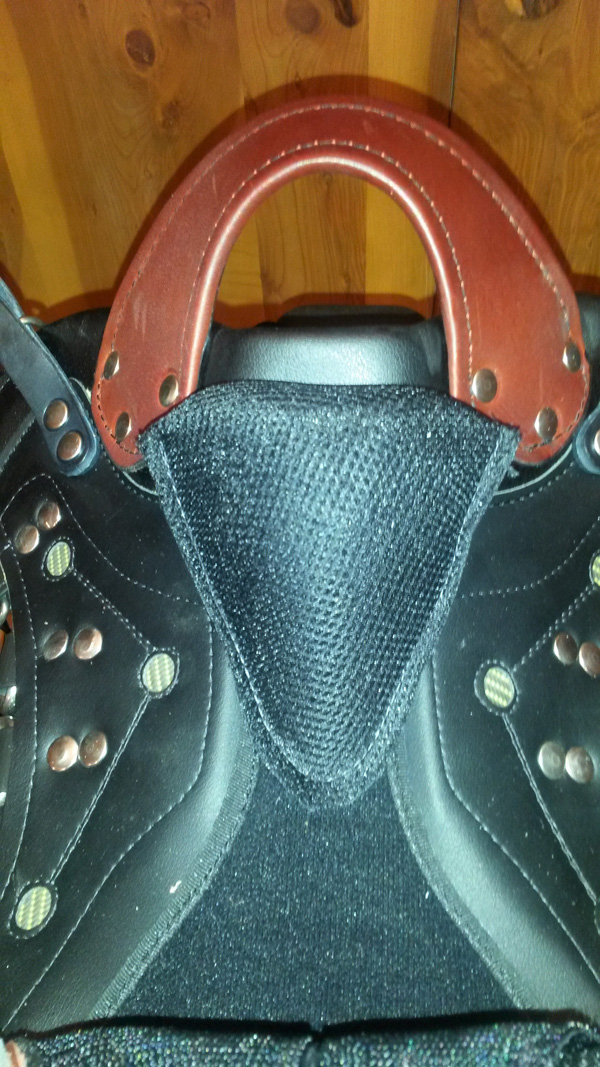
Most people have heard to use sweat patterns to determiine if a saddle fits a horse. There are a lot of reasons sweat patterns are confusing for any saddle, but especially treeless saddles. A treed saddle is typically heavy enough to create its own "pattern", whereas many treeless saddles are so light they're barely affected by gravity, especially compared to the lift a horse can create. Any opportunity for air to go under the saddle (rising trot, bouncy canter) can cool/dry the back. The pad can affect the sweat pattern even more than the saddle - one that wicks away moisture or allows airflow might mean a sweat pattern is almost impossible to get, let alone determine anything about saddle fit. You will typically see more sweat from friction/motion than from pressure differences. And of course a dry spot can mean no pressure/contact/motion or it can mean too much pressure - sweat is pushed away or even damage to the skin so the horse can't sweat anymore.
This difficulty is especially true of Ghost saddles, which are designed to maximize air flow through a clear spine clearance. The sympanova pad has tiny ridges that allow air to flow up to the spine channel, keeping the back cool and dry. Even after 25 miles of trotting and cantering with a saddle/horse combination I've checked with an Impression Pad, we had sweat/grunge only around the front and back of the pad and under the girth rigging area.
So what to do? Certainly look at sweat patterns. I still do after nearly every ride. I want to know the spine is dry and that nothing has changed and that I'm riding symmetrically. You do need to have ridden enough for your horse to be generally sweaty, at least an overall sweat on the neck/shoulder for the pattern to have much meaning at all. Look for asymmetry - maybe the rider is imbalanced, maybe the horse has developed a bigger shoulder and needs some work to address that. (although my horse with 8 degrees difference in his front feet angles and a huge left shoulder gets a pretty even pattern and has even learned to enjoy walking in the Ghost). If you see small, round dry spots that correspond to girth or stirrup hardware, there is something to be concerned about. But bigger areas, particularly behind the shoulders can just mean that previous saddles have left hollows, areas of muscle atrophy, allowing more air to dry the area. Over time, the horse may increase his stride, use his topline better and fill in these areas. Or it can just mean this is an area where there is little or no motion to cause sweat. This video by master saddler John Schleese explains it nicely. Here is another simple, but clear explanantion for similar dust patterns.
Instead of focusing only on sweat patterns, look at your horse's way of going. Is his stride long and normal or has it suddenly become short and choppy? Will he willingly canter on both leads? Does he seem happy or do his ears pin on canter departs? How do you feel? Balanced front to back and side to side? If you're tipped down, a pommel bolster may be the solution - and this can help your horse as well. There are a lot of things that can be done to adjust the Ghost - from adjusting or shimming panels, shimming the pad, to placing spacers or bolsters between the seat and base. While the saddle may work as it comes out of the box for a large number of horses, many of the rest will only require a small tweak.
There are sweat patterns we do not like to see. Small, round dry spots with well defined edges indicate pressure and are rarely seen with Ghost. The only time I have had that is with a pad that didn't support the shape of the panels completely, causing a pressure ridge. Large, splotchy dry areas behind the shoulders usually are just an indication that the horse hasn't sweated up completely as this is that last area to sweat since the saddle moves so exactly with the horse in this area.
Impression Pad
Throughout all my testing I've found dough-filled pads to be unreliable in testing treeless saddles. Both in exaggerating small issues and completely missing others. For Ava, whose back doesn't match the base shape at all, we got this result:
After 25 minutes on a warm day. All I can figure is that the rock was moving the dough back and forth and we ended up even. Seems illogical, but I really should have had a terrible pressure spot. The one thing I did notice was that once I got up in two-point or did a couple little jumps, the saddle would just keep tipping forward because the saddle fell into the dip. So I ended up with a bit of a ramp toward the front, still no pressure spot. But others have gotten pressure spots on one side after a spook because the saddle kept falling into that spot. I will still use my PLIP, but I don't think it's as reliable as with treed saddles.
Pressure sensor testing
Even a pressure sensor pad can have limitations - and they are quite expensive, so very few saddle fitters have them. I certainly don't have an extra $7000 lying around, so we built our own! Stace is quite good at things like this and has been wanting to build one for over a decade. Now the components for something simple are affordable, as well as reducing the size of storage media for portability. His first pad has only six sensors taped to one side of a USPS priority mail envelop! But we can move the sensors around, so we can gather data in very specific circumstances. Biggest drawback is this one needing to be attached to a laptop, so very limited motion. I could sit normal, chair seat, go into two-point, squeeze my thighs, and lean side to side, have the horse take a couple steps.
With this version, we were able to verify the reason for pressure spots from a panel/pad insert misalignment, validate shims I was using on Ava, and start testing different panel and pad materials. The next version of the pressure sensor pad will have 24 sensors, 12 on each side. Six will be in a line along the center of the weight bearing area of the panel, six will be clustered just above in the area lined up with the stirrup rings. So we'll be able to see max pressures and overall distribution of weight at one time. We're also planning to save data to a thumb drive so we'll have portability! One of the difficulties is that the output voltage converts to psi (pounds per square inch) via a logarythmic scale and we haven't found a reliable formula, so have been limited to looking up data. Hoping to fix that and maybe even have a color display next time around.
So the important part of looking a pressure scans is to know what is a good result and what isn't. At what pressure can we cause dry spots, white hairs, damage sweat glands? Are all of those at the same pressure level, just different times? I really don't know. I've read a bunch of papers on this and not found much agreement. There's even papers on the disagreement between researchers. Really, why can anything about horses be simple?! A conservative limit I've read is 1.5psi but it was in the papers of someone with a product to sell. More independent studies seem to group around 2.5psi - and that's at 2 hours of constant pressure to cause damage.
Once I got Ava all shimmed up (and desperately hoped for a great sweat pattern - fail) we rechecked with the pressure pad in the area of the big, irregularly shaped dry spot on her back. In two-point, leaning, chair-sitting, squeezing, whatever, all readings were under 1.5, around 1.3 typically with a few instantaneous closer to 1.5. I couldn't get anywhere near 2.5 - it took putting Stace on board at 230# to get to 2.5psi. And he's 40 pounds over what we recommend for Ghost saddles. Other than the annoying sweat pattern that we just might have to chalk up to anomolies between horse shape, motion, rider motion, and the breathability of the saddle, I'm quite pleased.
Check back - I will keep updating this here or on my testing page. Note: after 1 year of riding, testing, and competing in 25, 50, and 75 mile rides I've only had one sore back. This was the result of riding a very hilly ride, trotting 10mph up and down, with too long of stirrup straps. My fault for a minimal test ride before the competition and not taking a hole punch with me! And interestingly, during our entire competitive season, my sweat patterns were quite good on both my horses with various pads including Toklat Matrix, a Black Diamond knock-off of a Grandeur pad, and still my favorite, the Ghost sympanova pad. Once the season was over and days were cooler, I've again found it difficult to get my in-shape horses to sweat enough for a full sweat pattern.
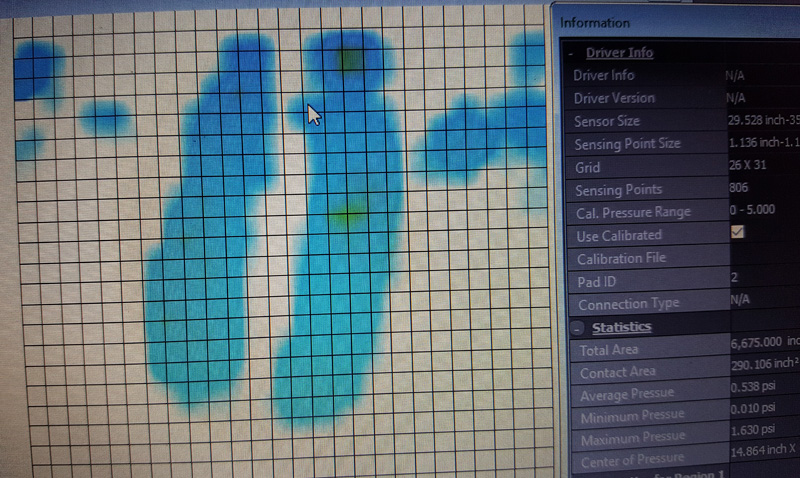
UPDATE: I have purchased a pressure sensor pad now! It was expensive, but not at the high end and ultimately, not the best quality overall as the pad isn't horse shaped and therefore wrinkles. In time, the wrinkles affect the readings. Once we've worked through some of the limitations and figured out what noise to ignore, we have gotten some very good data. I'm actually quite impressed by the ability of Ghost to distribute weight.
This is an example of me riding my mare Csavannah at the walk, turning slightly. The spots off to the sides are my legs (this pad is really huge). Overall, an extremely balanced, very low pressure distribution.
Seat size
Seat size isn't typically discussed regarding fit for the horse. But because of the flexibility of treeless saddles it can still be a factor. If you're riding in a saddle too small, your seat bones may be up on the cantle which will affect your balance and how you push against the stirrups. It's possible to create a bridging situation. The 18" seat runs a little large, but if you think the 17" might only be a bit small, it's not a problem to move up to the bigger seat because I have 1/4" and 1/2" seat spacers to help you get the seat size and comfort you desire - some people like space, some want to feel the cantle passively around their butt. It's best to achieve this with the spacers instead of running too small a seat. Ghost makes these as well, but I always send my spacers out for demos if they might be needed. Then you can decide if you want to keep them or buy the pretty Ghost version!
Another thing never discussed by saddle makers is the importance of rider foot size in choosing a saddle. Why? Most english saddles are still copies of saddles designed for men in the 1700-1800's. Not women. Some saddle makers are starting to understand the concept of pelvis shape and where the femur attaches when designing saddles for women, but most still have not relized the importance of having your leg under you (beyond an instructor yelling at you). Most women's feet are smaller than men's and for women with feet generally on the small side, they're usually forced to work very hard to get their legs back or to post, with the goal of achieving a shoulder-hip-heel alignment. So here's an exercise. Sit on your saddle in a neutral but balanced position without stirrups controlling leg/foot position. Find your seat bones and mark that position as it aligns to the side of the seat. Then hop off and put your pinky on that spot and spread your hand wide. Your thumb should roughly line up with the stirrup hanger. The reason for this? Check it out - the span of your hand matches the length from your heel to the ball of your foot. So if you want easy shoulder-hip-heel, effortless posting, you want your stirrups to be hung no farther forward than that hand spread. I don't care what instructors say, riding/posting should be easy and the saddle should help you find the correct position! Ahem, off my lecture stand now. ;-)
Check out this page on choosing the right Ghost model for you between seat size and thigh block angle and this page for some pictures with different seat spacers.